Manipulated Photo Analysis
As a citizen who followed the Gezi Parki protests that marked the past month through written, visual, and internet media, my interest was drawn to various photos that caused frequent debates among the public and parties involved, in addition to the events. While one side blamed the other side through the photos, the other side claimed that the photos were fake and manipulated. For citizens like me who live at the peak of skepticism due to their profession, who can’t believe what they hear or see without scrutinizing it, I’m sure it must have been a considerable curiosity to find out which photos are real and which ones are fake. In this writing, although not 100% certain, I will briefly mention how a photo that has been manipulated and altered (we can also call it a photoshopped photo due to the brand name it has become) can be detected.
Error Level Analysis (ELA) is an algorithm that was introduced by Neal Krawetz in 2007 at the BlackHat security conference. It is used to compare errors that are present in a JPEG file at a certain image quality level with the errors that were present before the file was saved. When you save a JPEG file multiple times, you will notice that the quality of the image decreases, and after saving it 20 times, the quality of the image will reach its lowest level. JPEG is an image file format that loses image quality with each save, which makes it possible to use ELA.
Let’s briefly look at how we can detect manipulations made to a JPEG file by putting the theory into practice. There are two tools we can use for ELA, online and offline. We can use the ela.py tool, written in Python programming language, for offline analysis. If we look at the source code of the tool, we can see that it saves a given photo at 95% image quality, takes the difference, and visually presents the error level. Since the manipulated, altered areas of the photo have a higher error level after the recording, it is possible to visually detect the manipulated areas with ELA.
Let’s briefly analyze the original state of the photo I took for this article and the manipulated state with Photoshop using the ELA technique.
On the left is the original state of the photo I took, and on the right is the analyzed state of the photo with the ELA technique.
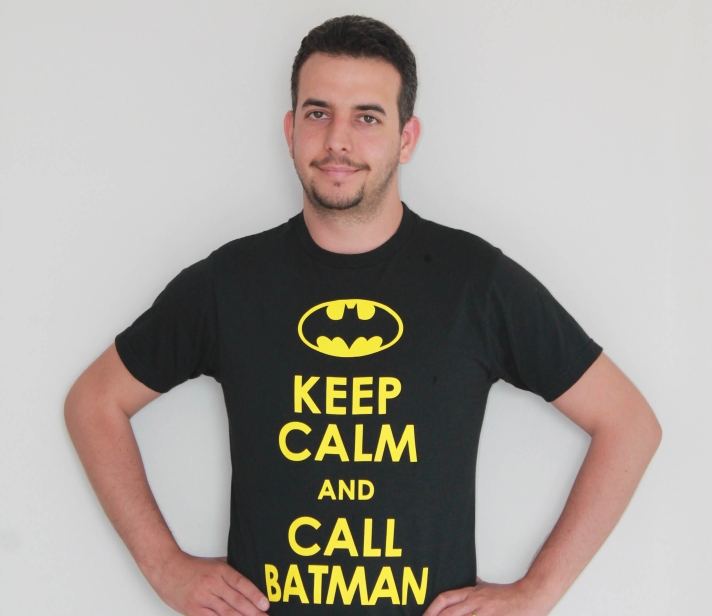
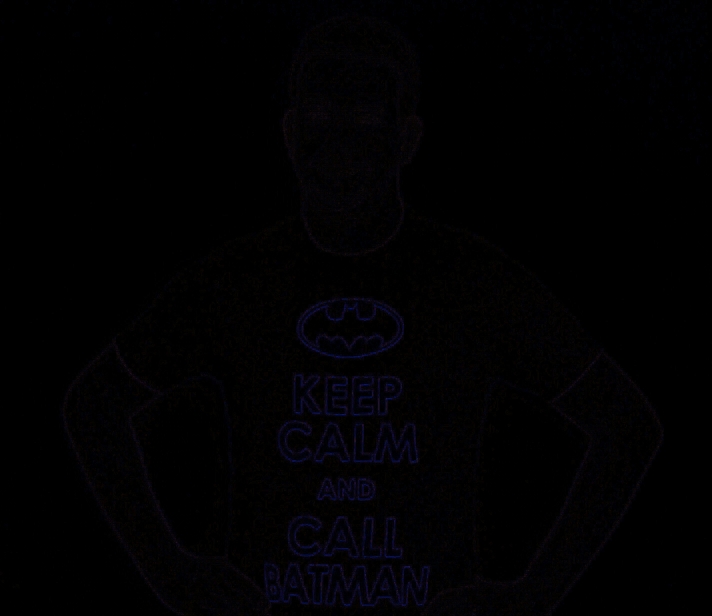
At the left, you can see the manipulated version of the photo I took (the Batman logo has been painted red) and the analyzed version of the photo using the ELA technique.
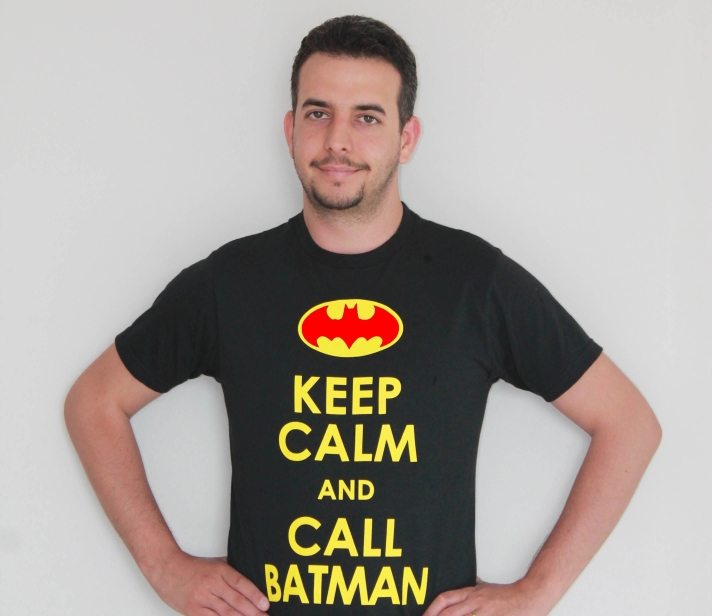
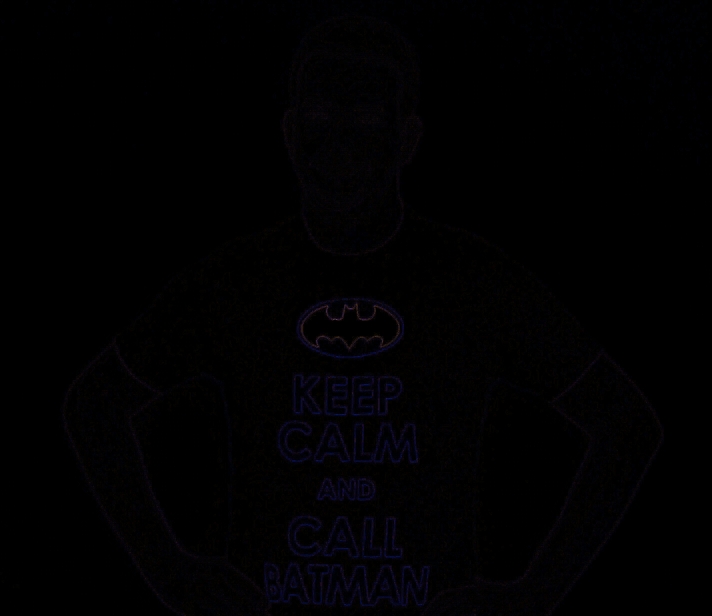
If we look more closely at the two logos, we can see that the ELA of the manipulated photo is higher, indicating that there is a color difference (redness).

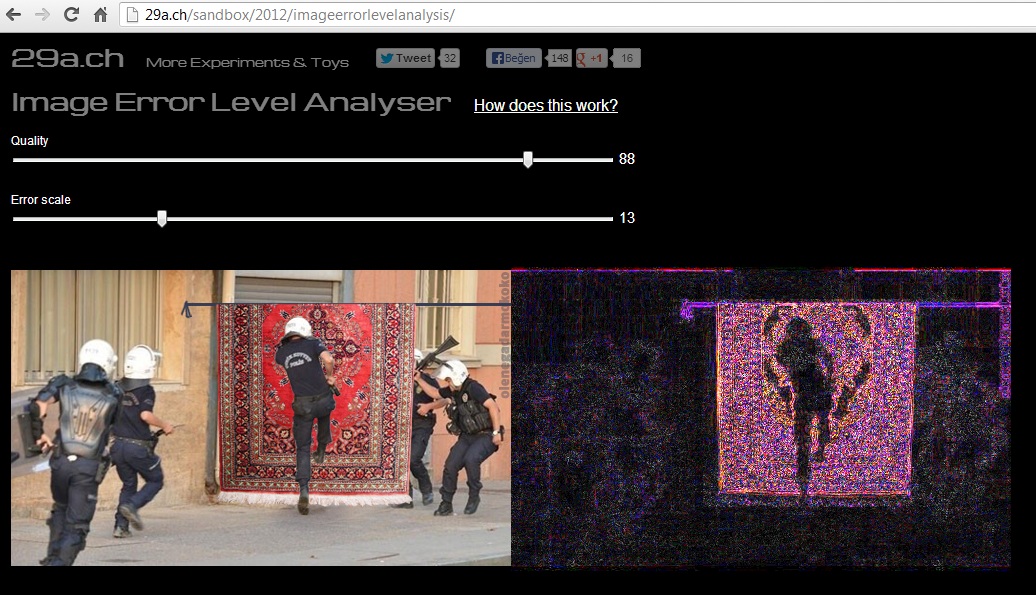
Online analysis can be done using the Image Error Level Analyser tool on the 29ach website. With the support of HTML5, this tool allows us to easily see the ELA result of the photo we suspect or want to analyze by dragging it onto this page. To improve your Error Level Analyser tool and ELA skills, you can use montage photos from the bobiler.org site, which is frequently shared on social networks and media in recent times. For example, in this photo obtained from the bobiler.org site, we see a few police officers running on a carpet hanging in the middle of the road. Even if we can guess that this photo is not real by reasoning, we can determine which parts are manipulated by analyzing this photo with the Error Level Analyser, which has been created as a result of a successful montage.
As can be seen, the manipulation of the carpet and the part where the carpet is hanging is clearly visible, so we can easily say that tampering has been done on this photo.
In conclusion, with ELA, you can analyze photos that you have doubts about their authenticity, but it is important to never forget that ELA does not always provide a 100% accurate result and there may be cases where manipulations cannot be detected. To get more information about ELA and see some example analyses, you can visit this page and this page.
Hope to see you in the following articles.